Yesterday, I went to Raleigh with my Master Gardener class. We went to the soil lab, the insect collection and the disease lab. I learned many useful things.
Seeing the process of the soil lab was fascinating. It takes 2 days to dry down the boxes in big, walk-in ovens that hold over 3,000 samples at the time. When they’re dry, a specific amount is put in a falcon tube and a standard amount of water is added to it. (I didn’t take notes and don’t remember the exact amounts. 500g and qs DH2O to 50 mL maybe?)
There are instruments to check the pH and instruments that measure the various nutrients. They don’t bother measuring nitrogen. It is too ubiquitous in the environment and too easily changed. What you measure this Fall may not be remotely the same next Spring.
Because of the number of steps necessary to complete the analysis, it takes about 2 weeks to get final results. It may be sooner in less busy times. But, don’t depend on that. Give them 2 weeks before you get antsy. Results come via email.
If you order a soil analysis between the end of November and the end of March, it costs $5/box (that’s a $1 increase from last year). From April 1 until around Thanksgiving, it’s free. The exact cutoff has to do with when farmers start clogging up the works in order to get ready for next Spring.
The insect collection is …. vast. They are given samples by collectors AND every one of that crowd brings things home from vacation. They have samples that were collected in the 1800s.
There are 3 ways that insect specimens are stored. Most are pinned. You know, like the Victorians did it. But, tiny ones are stored on microscope slides and soft ones, like larvae, are stored in little bottles of alcohol. Those have to be topped up periodically.
I didn’t take many pictures. But…. Lookit.
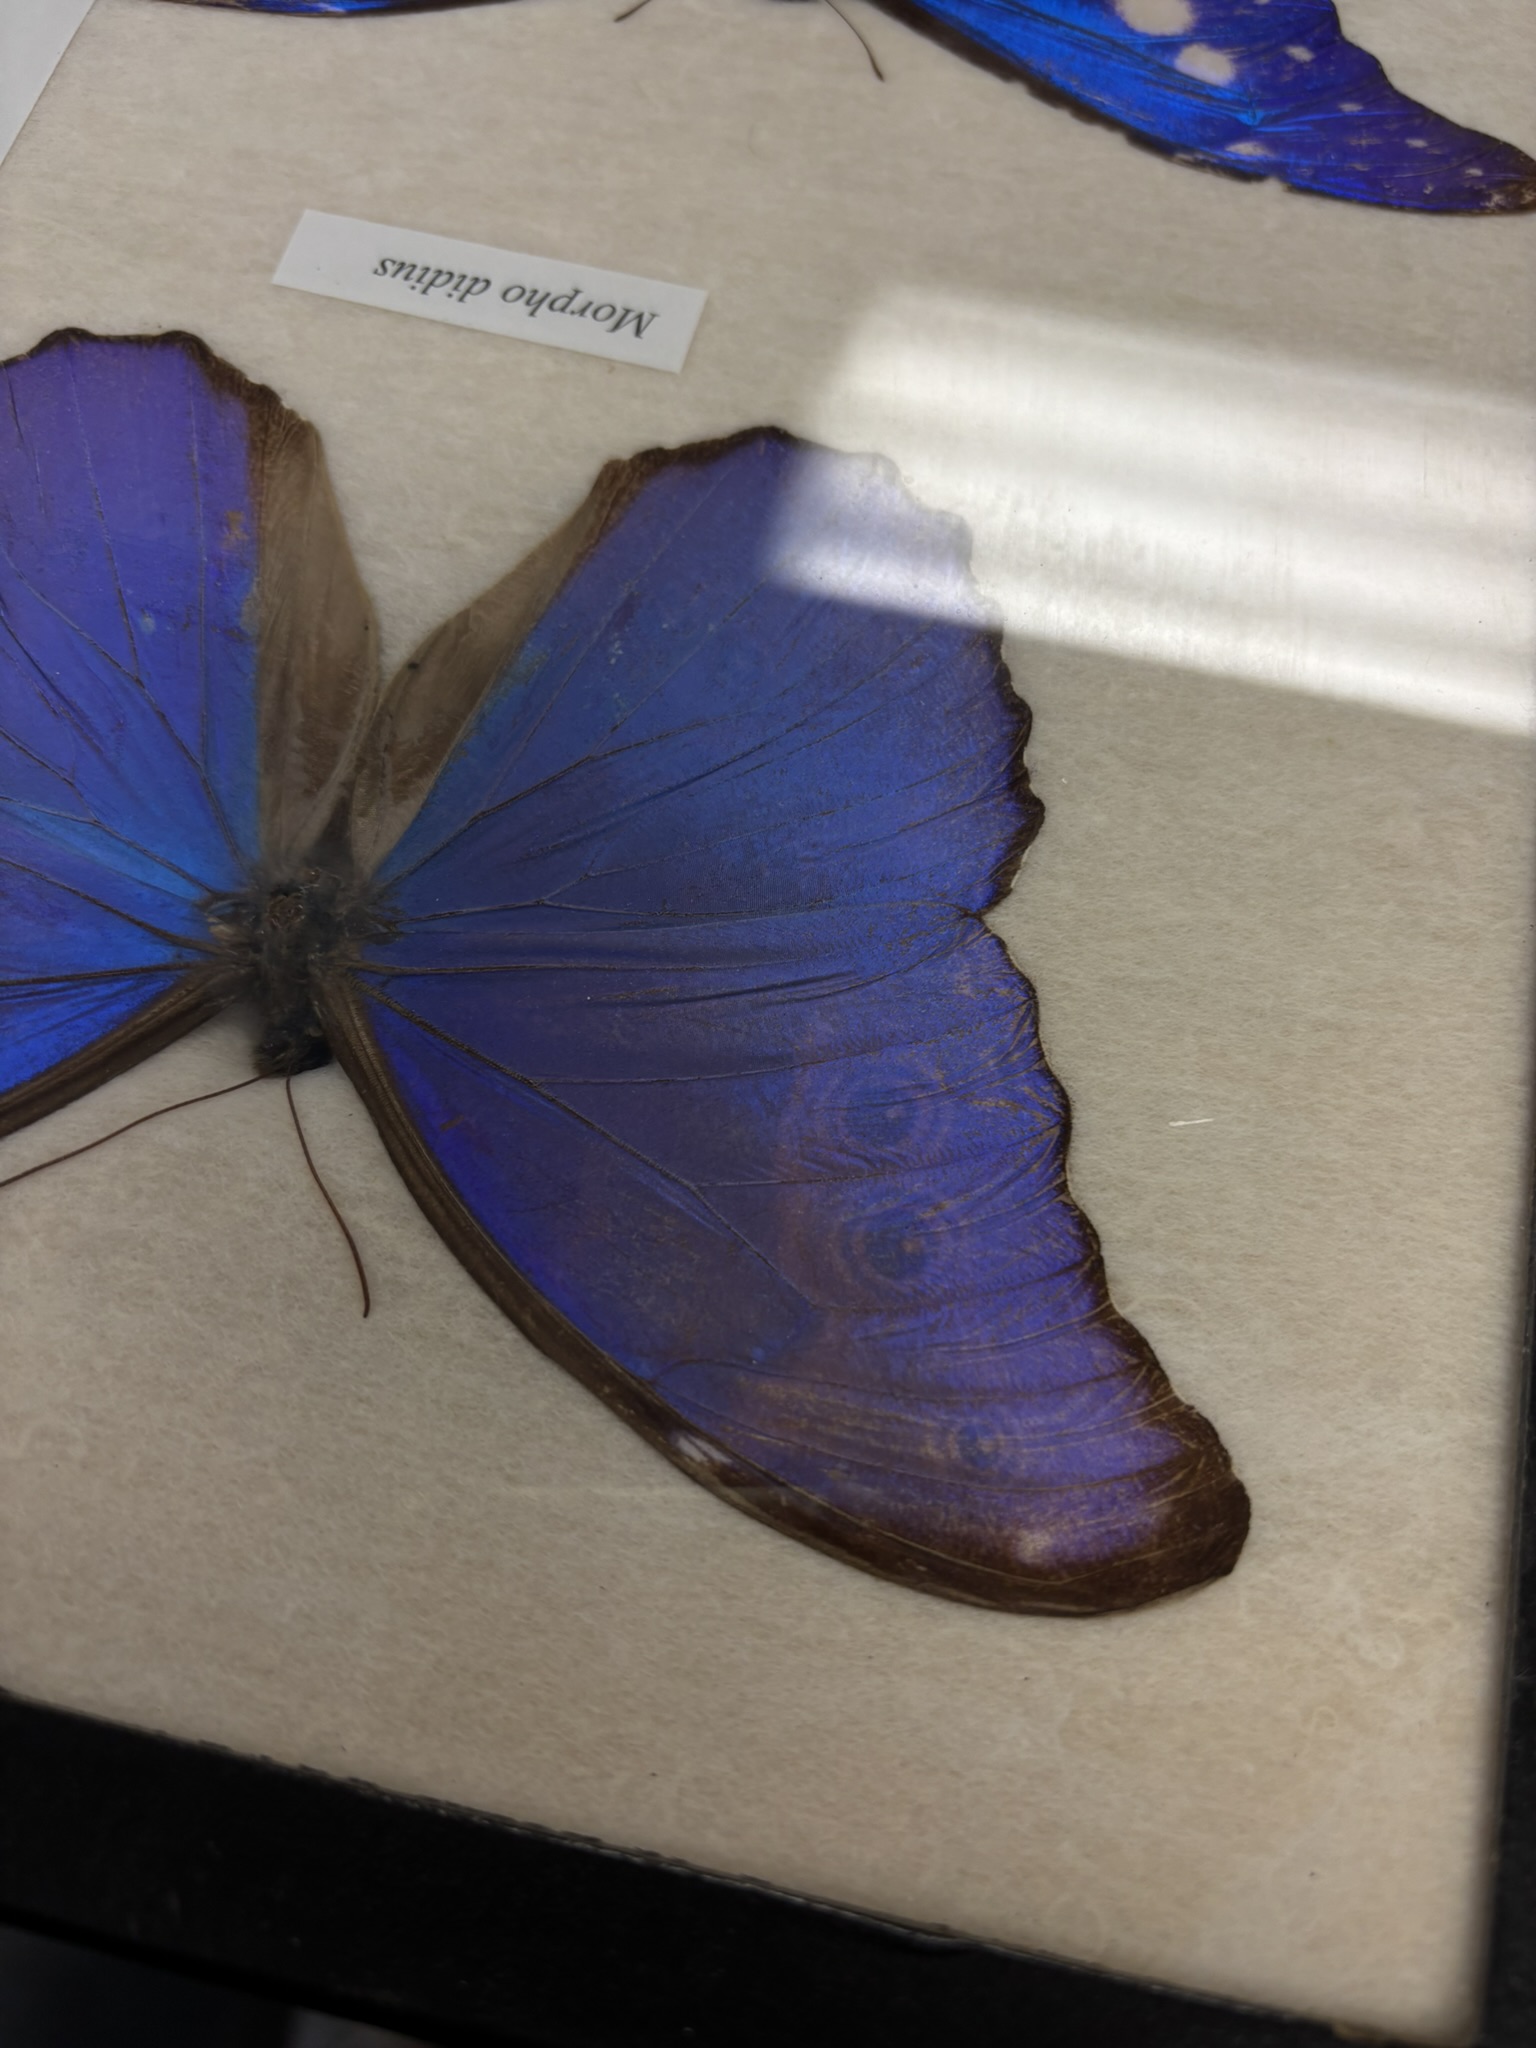
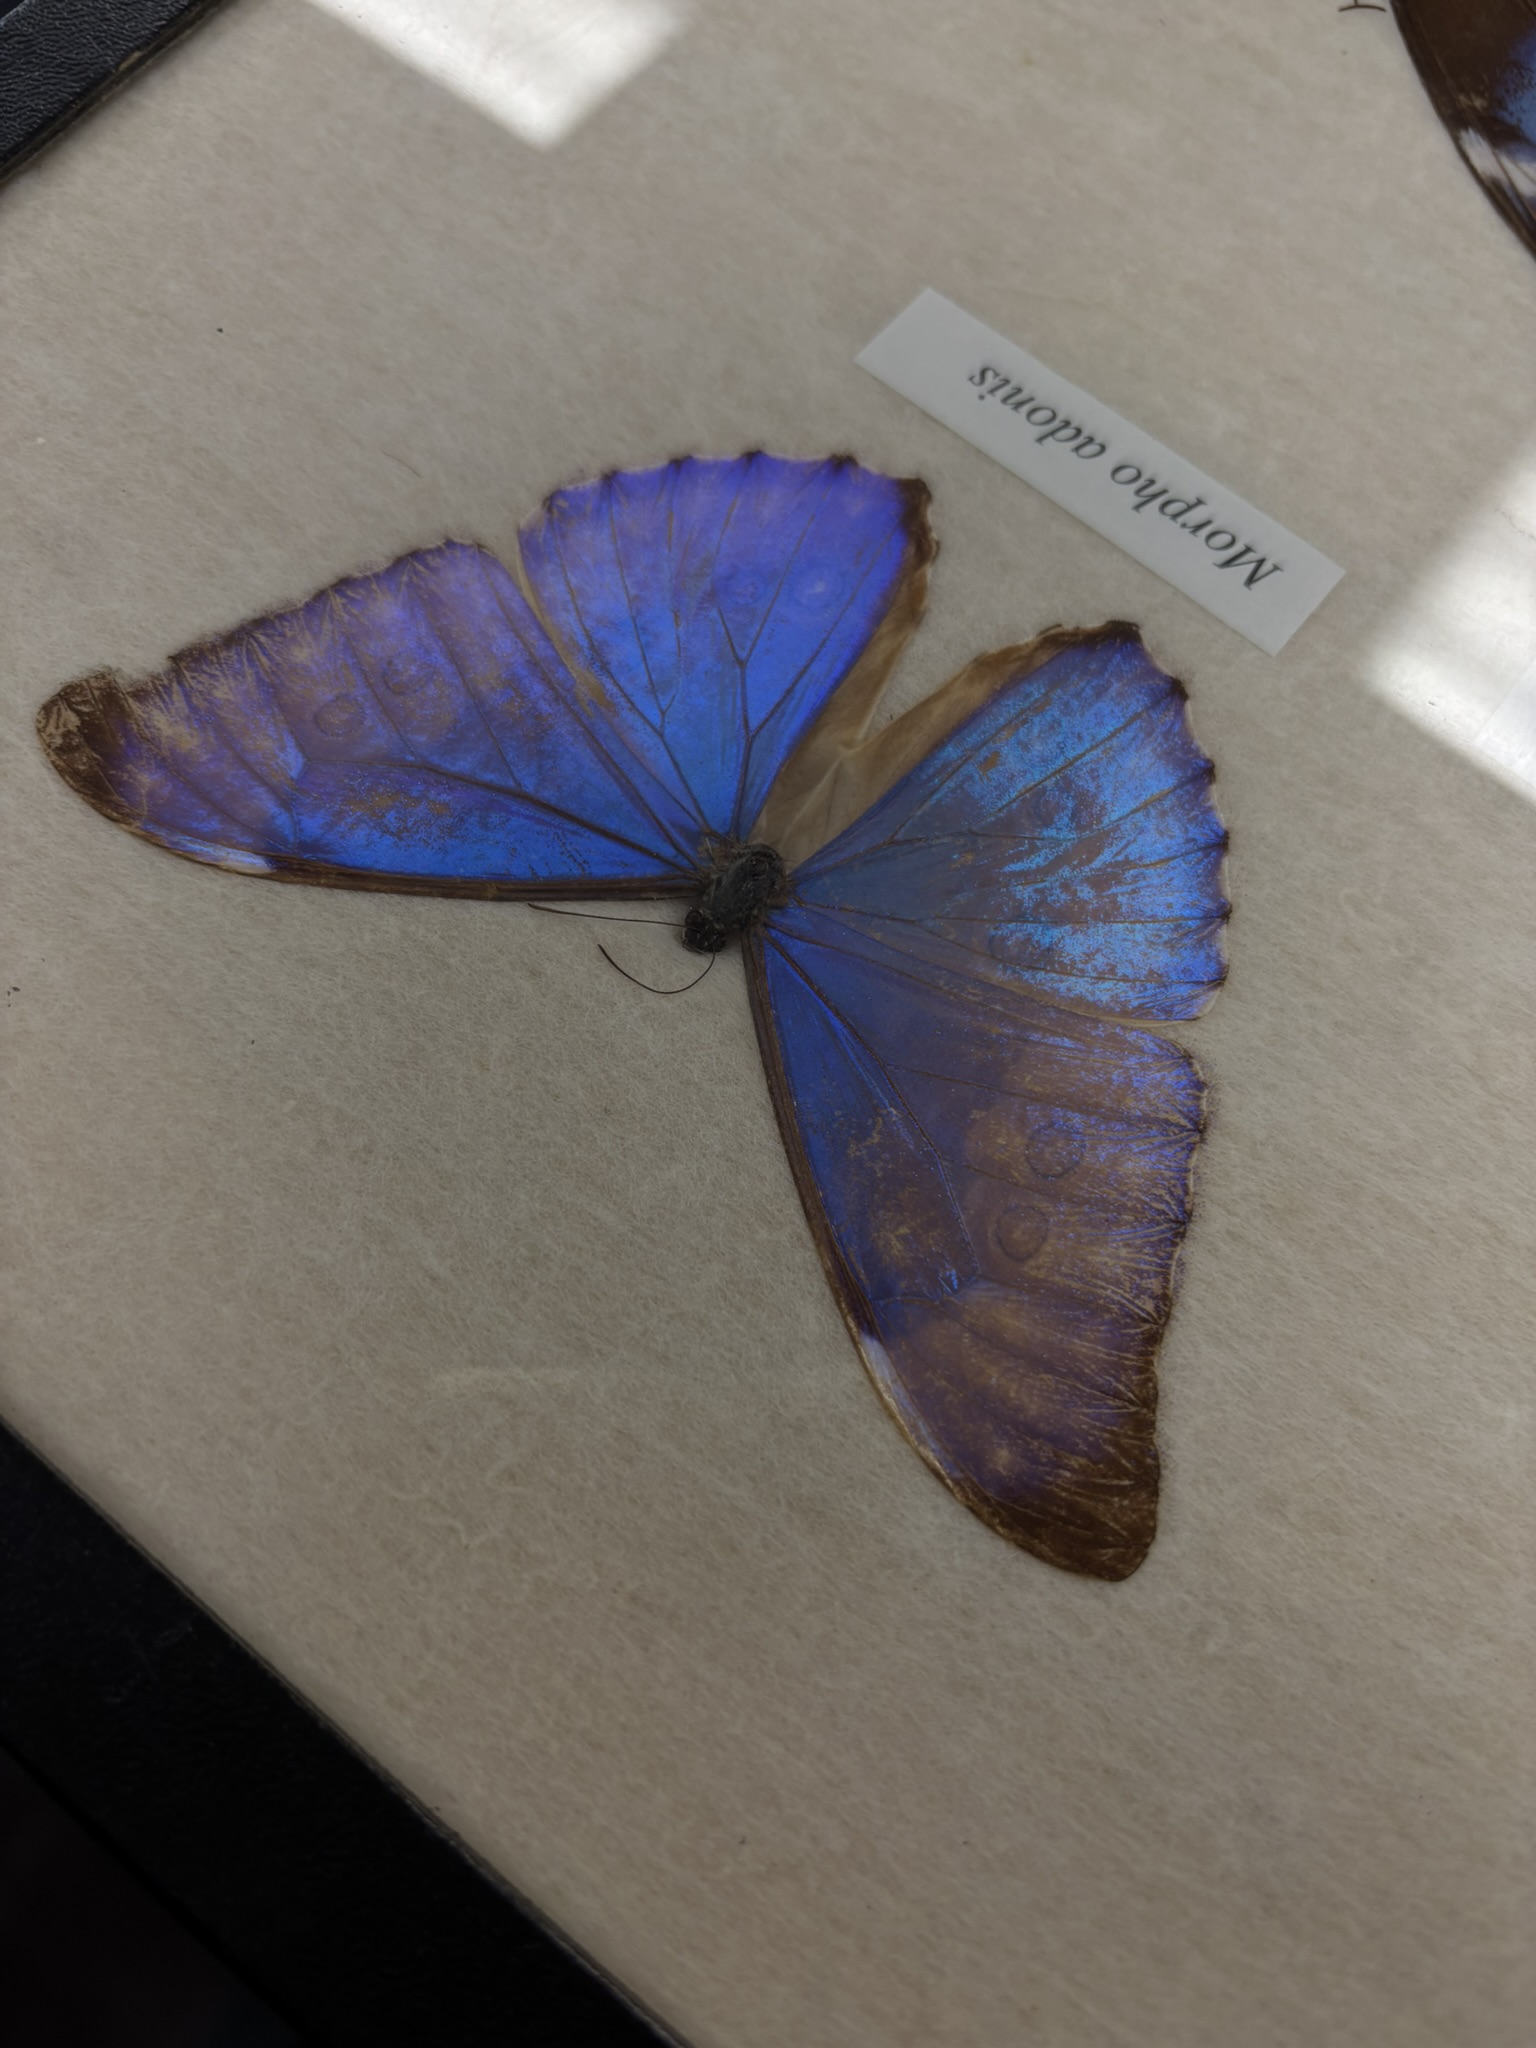
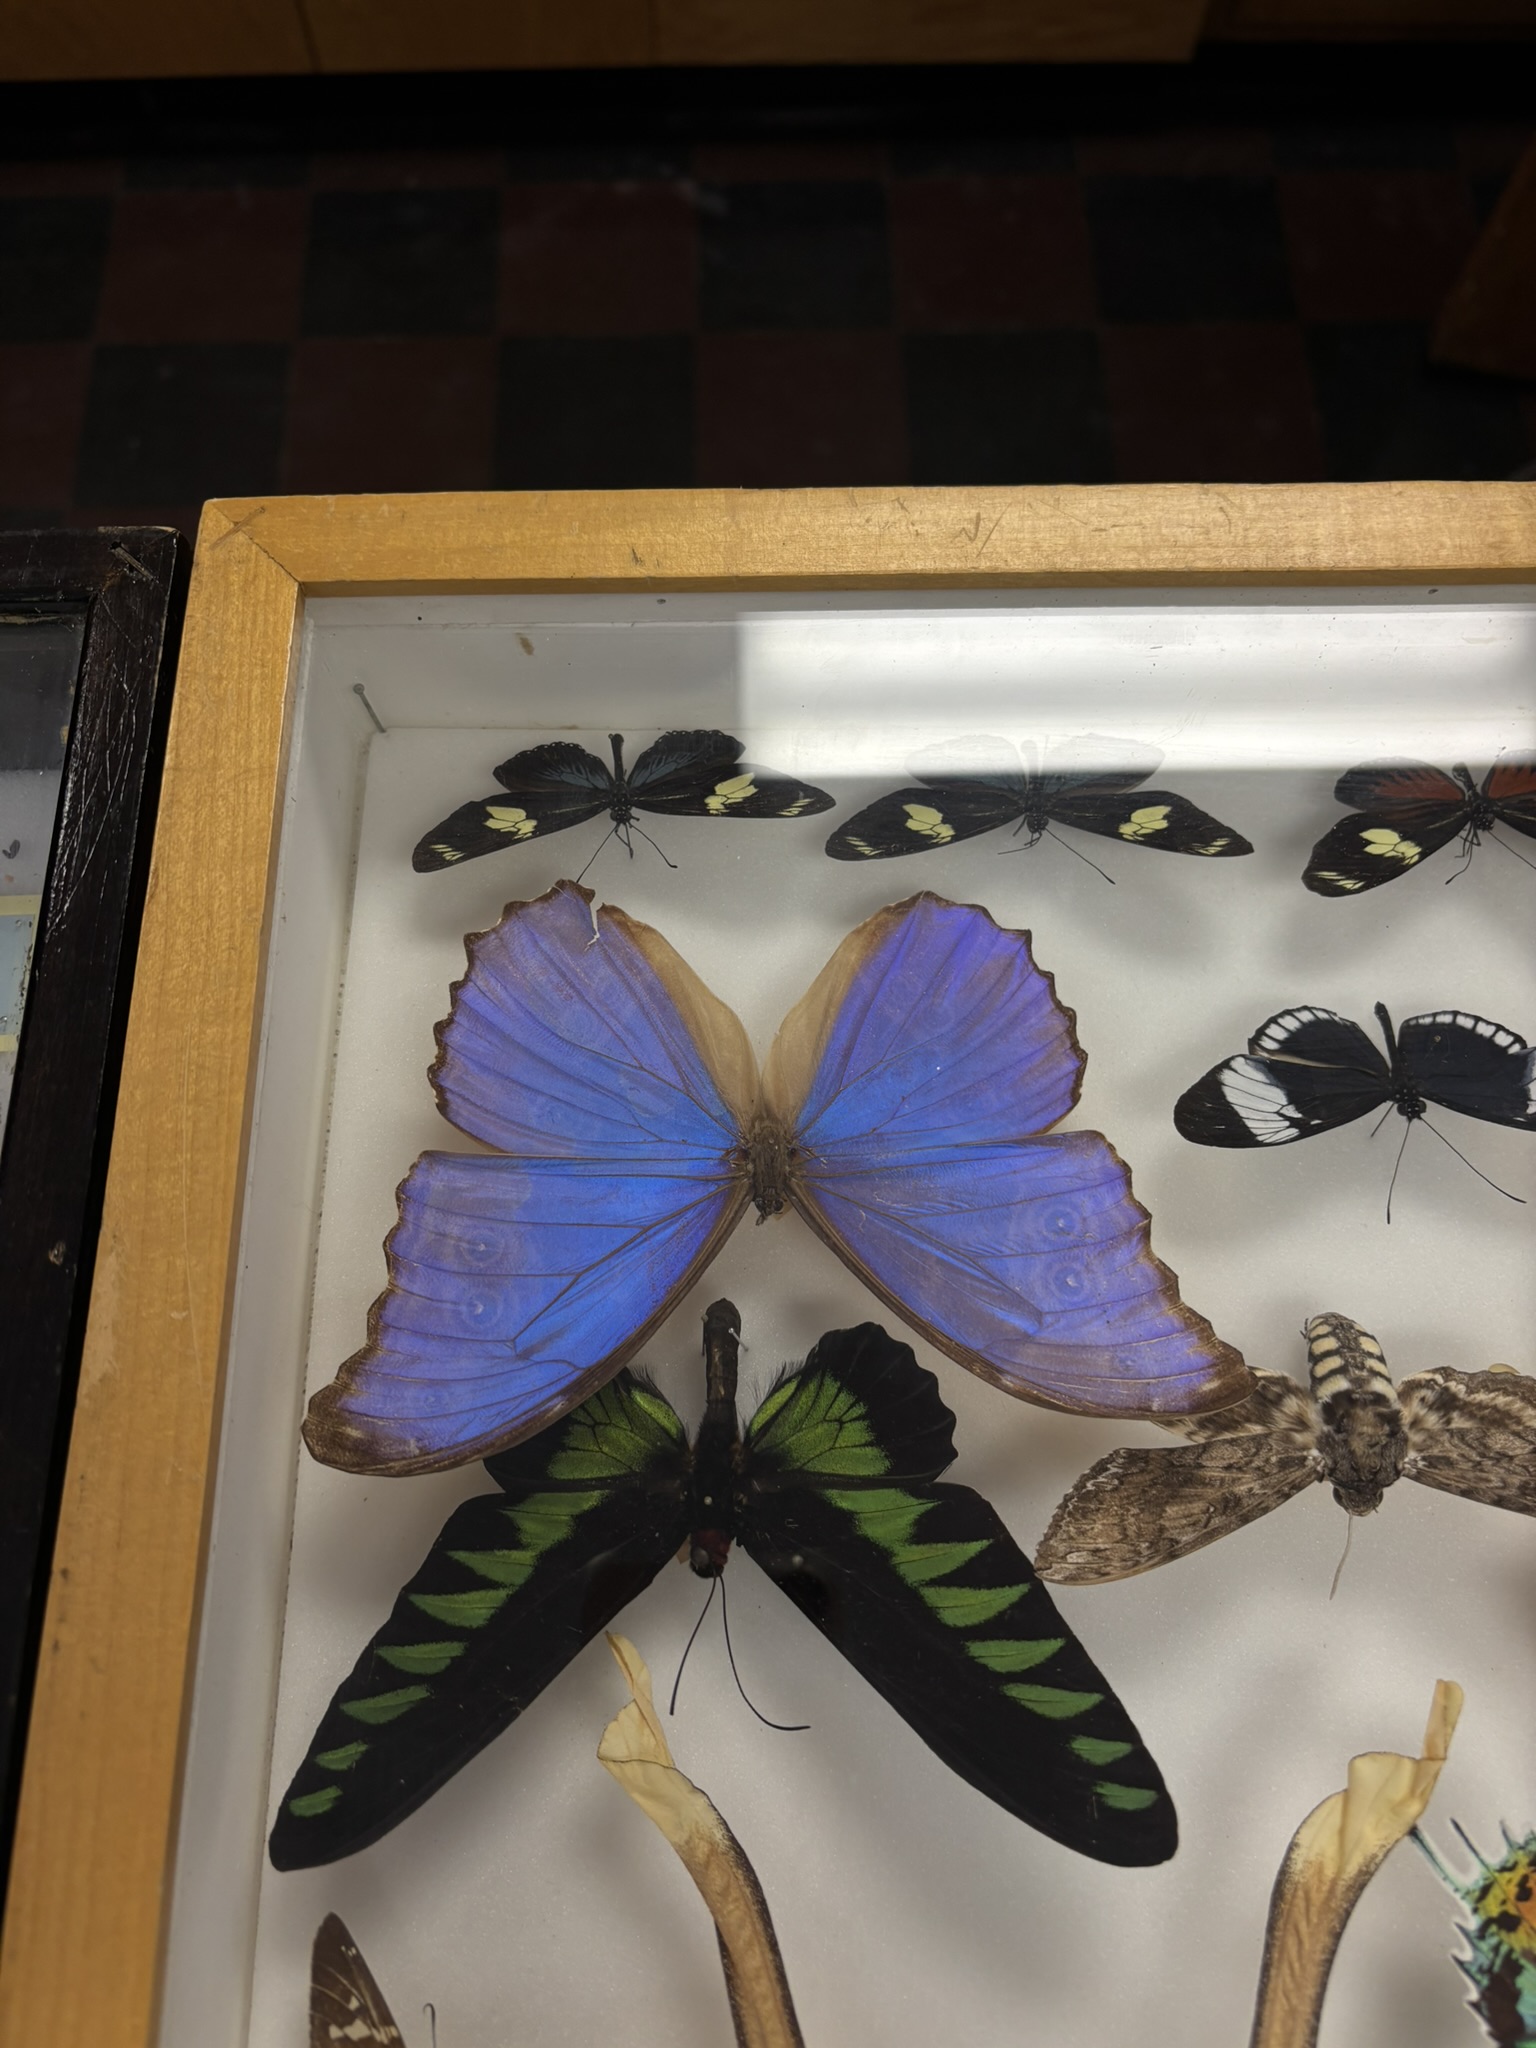
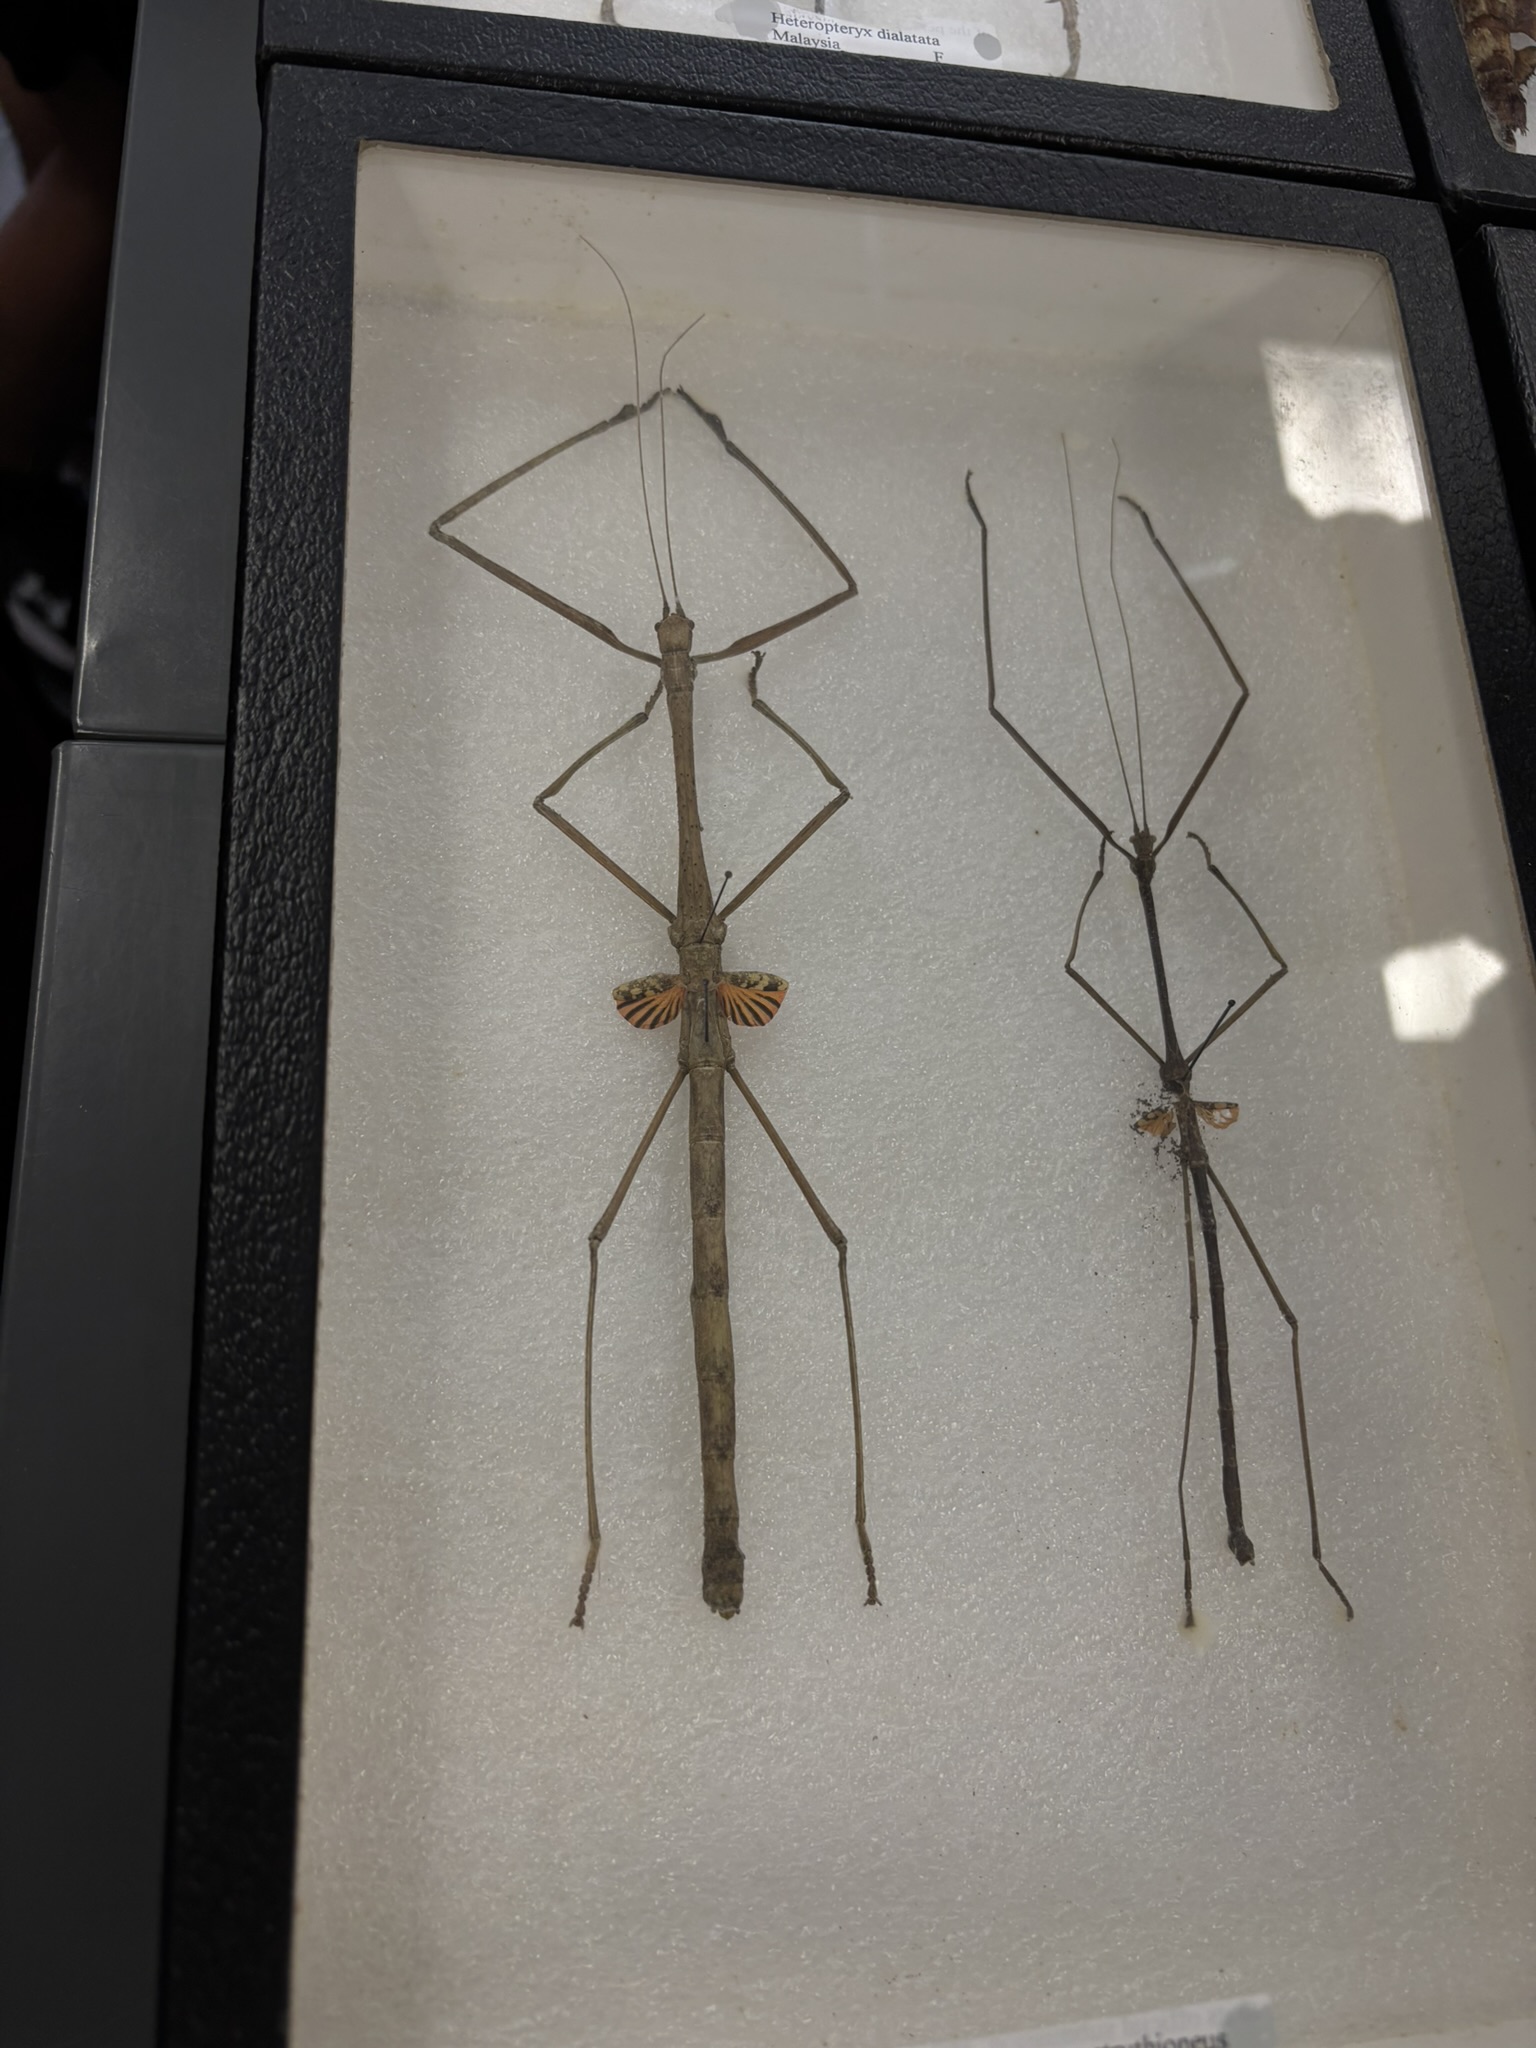
Zoom in!!
Then, we went to the Plant Disease and Insect Clinic.
Whoa.
If you have a plant that is unwell, they have someone who can find the cause for you.
Sending pictures is free. Take lots. Take a broad view so that they can see where it is and what’s around it. Take pictures of the whole plant. Take pictures of the base, even if you don’t think that’s the problem. Take pictures of the back and front of the leaves. Take pictures of the problem area from all angles. If it’s on a branch or twig, scrape off a little of the bark so they can see where it is healthy and where it is dead (that’s the transition area. HA! Look at me learning a term.). Or if it’s not at all.
IF they can’t tell you what’s wrong from all those photos, it will cost you $20 for them to examine the sample you bring or send in. (It may be easier to dieliver it yourself than to ship, depending on where in the state you are.) Bring a piece of the damaged part of the plant and the roots. Dig them, don’t pull them. If you pull, you rip off the rootlets that may have important info. Include the soil around those.
There is always someone available to answer the door and take your specimen from 8-5 during the week. Ring the bell and wait a minute.
It should take about a week to get a report.
When you are filling out the info, give every piece of data that you can think of and there’s even a place for you to tell them what they haven’t asked. Don’t feeling like you’re being excessive. The more details they have, the easier it is for them to figure out your problem.
I was tired of standing at the end and wish I’d had more time. Everyone was excited to tell us about their specialty and I would have been happy to listen longer.